Before you get started, think about what you want from your page. More web traffic? Brand awareness? SEO?
We also recommend taking a look at what your competitors and other businesses within your niche are doing. Think about what your customers and fans might want from you. Product information? News? Videos and images? Or a mix of everything?
We have a detailed list of actions for you in the post, but you might want to start by watching Kieran S-Lawler run through his process on how to audit a Company Facebook page:
Creating your Facebook page
Already got a Facebook business page? Skip to the next section.
Follow this link to create a business Page on Facebook: https://www.facebook.com/pages/creation/
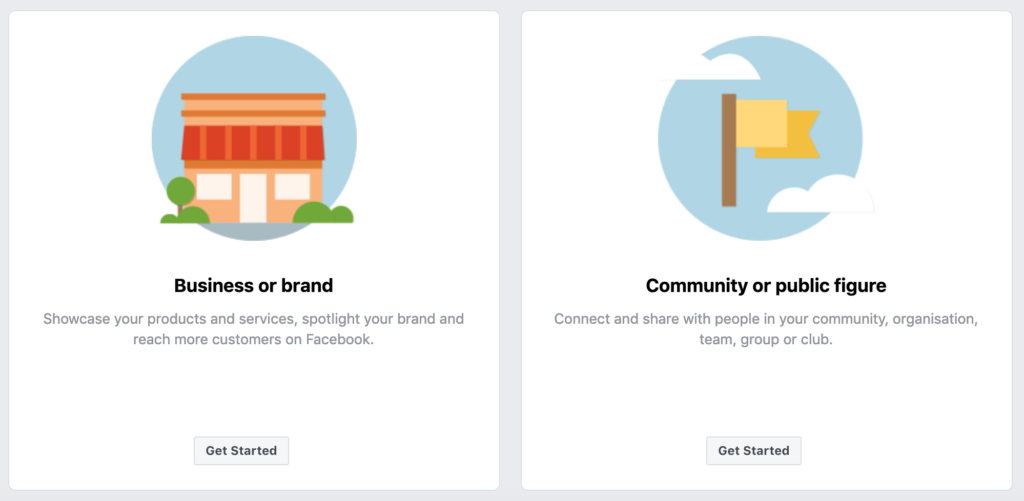
Once you reach that page, you’ll see two options, “Business or brand” and “Community or public figure” – click ‘Get Started’ in the “Business or brand” box.
You’ll then be required to fill out some information – including your page name. When naming your page, we’d recommend considering what your usernames are on other social platforms. It’s best to ensure consistency across all channels to make sure you’re easy to find when customers and fans are searching for you.
Facebook also have their own guidelines for what is considered acceptable for a business page name. It’s important to stick to these to ensure your page gets coverage across the platform and isn’t taken down for violating their terms.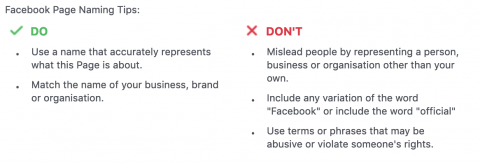
Page aesthetics
Once you’ve created your page, you should do the following to make sure it looks the best it can and gives a great first impression to your customers.
Create a username and claim the URL – e.g. http://www.facebook.com/HallamAgency rather than http://www.facebook.com/pages/Your-Business/1234567891011
This helps maintain consistency across different platforms, makes you easier to find and is much more memorable.
Upload a profile picture – this will most likely be your logo. The optimum size for this is 180 x 180, and remember to ensure the circular shape doesn’t cut anything off!
Upload a cover photo – this is often the first thing people notice about your page, so it needs to be on brand and make a great first impression.
The optimum size for this is 820 x 312, however will crop to 640 x 360 on smartphones, so it’s vital to ensure the design will work, and look great, on any device.
Here’s how our page looks –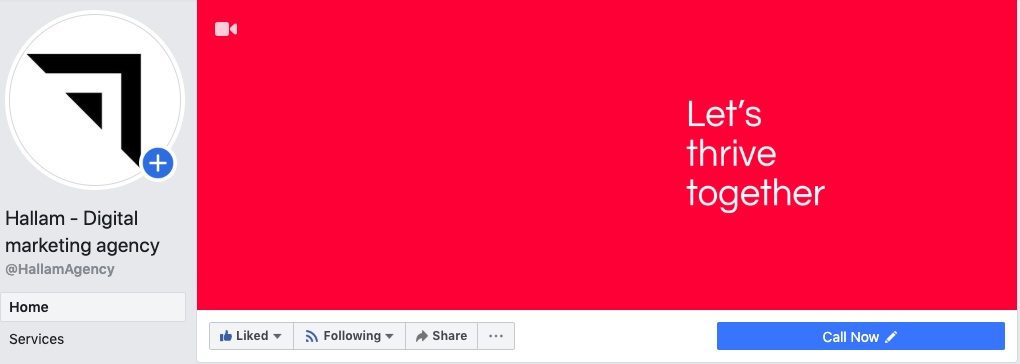
Choose a template – When creating your page, Facebook will use a template based on how you categorise your business. Using a specific template optimises the page for your business, with default buttons and tabs that are best for you. To check what template you’re using, go into settings and select “Templates and tabs” from the menu on the left.
Order your tabs – Did you know you can choose what tabs your audience see? To do this, go to the “Templates and tabs” section in settings, where you’ll see what tabs are currently on show and the order that they appear in.
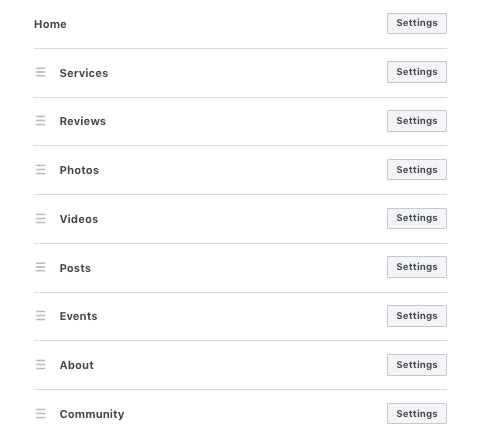
To change the order, simply drag and drop them into the sequence you’d prefer. Bear in mind that this also determines the order of the sections people see at the top of your page.
If you want to delete a tab completely, find it in the list and click the settings button to the right of it. There you’ll find a switch and you can simply click the “on” button to change it to off.
Useful tabs for you may be a “Services” or “Shop” tab, where you can list exactly what it is you sell, or an “Offers” tab, where you can post discounts or deals directly from your page. If they’re not appearing on the list, click “Add a Tab” and you should find it there.
Populating the page
Now your page looks great, it’s time to crack on with the content…
Add a description – this should be a brief summary of your business. You’re limited to 255 characters so keep it short and sweet – you’ll have other opportunities to go into more detail. If you need some inspiration, here’s ours –

Complete your ‘about’ section – here’s your chance to expand on more essential information such as contact details, opening times, or where to find your business.
This will appear in a tab on the left of your page, and also into a condensed block on the home page, making all this information easy for your followers to find.
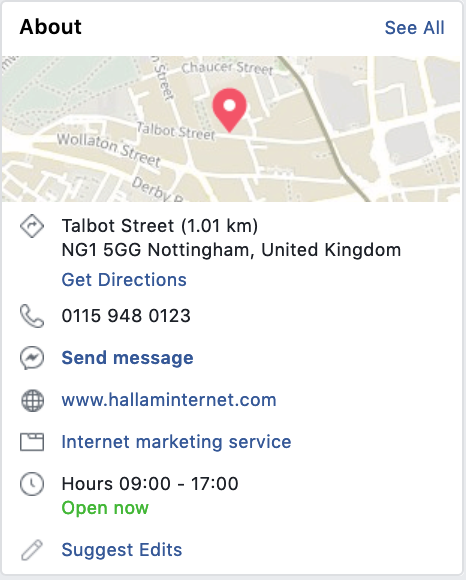
Add a call to action – want to make it even easier for your customers to get in touch with you? Add a call to action to the top of your page.

Click ‘Add a button’ underneath your cover photo and you’ll be given the option to add a button for various reasons, whether that’s to make a booking, contact you, or download your app. Decide which is a priority to you, fill in the details Facebook asks for and you’re good to go!
Link up Instagram – Also have an Instagram account? Link it to your Facebook page and give yourself an easy way to manage them both from one place and reach multiple customer streams with the click of just one button.
To do this, go to your settings, select Instagram from the menu on the left and then just log in!
Posting to your page
Add collaborators – Managing your page solo? You can ignore this step. But if you’re managing your page with a team, you need to give them access. Dependent on how they’ll be using it, you can assign each person a role.
Here are the roles that you can choose from:
- Admin – Can manage all aspects of the page, with complete access to everything. (As the creator of the page, you are an admin by default.)
- Editor – Can post to and edit the Page, send messages, create Facebook ads, see which admin created a post or comment, and view insights.
- Moderator – Can send messages as the Page, respond to and delete comments on the Page, create ads, see which admin created a post or comment, view Insights.
- Advertiser – Can see which admin created a post or comment, create ads and view insights.
- Analyst – Can see which admin created a post or comment and view insights.
Create a schedule – when it comes to posting on your Facebook page, it’s important to be consistent. The easiest way to do this is to plan your content in advance.
Consider including a variety of content, whether that’s the latest news, product information or a behind the scenes look at your business – whatever you think your customers will want to see. Once you’ve been posting for some time, you’ll be able to use insights to establish which posts perform best.
Not sure how to plan your content? We created a FREE social media content calendar that you could use…
Create your first post – Now you’re ready to go, it’s time to publish your first post – simply click “Write a post” and off you go!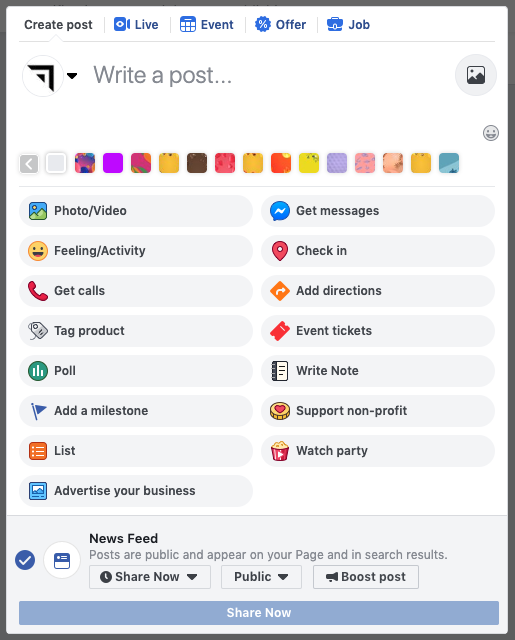
There are various different post types, which you can choose depending on what your end goal is. Whether you want to get calls, fundraise or post a job, Facebook has a post type for almost anything! You can also choose whether you want to post it straight away or schedule it for a later date or time.
Monitoring engagements
Once you’re posting on your page and start to build up an audience, people will comment on your posts or maybe message you on Facebook Messenger. It’s important to respond to these interactions to build up a good relationship with your audience and build a great online community.
You could do this manually, however if you have multiple social media channels to monitor it could be quite time consuming. Social media management systems are a brilliant way to keep everything in one place and monitor all engagements without missing anything. We really like Hootsuite and Sprout Social, but there’s plenty out there.
Another tool you can use specifically on Facebook is their Response Assistant.
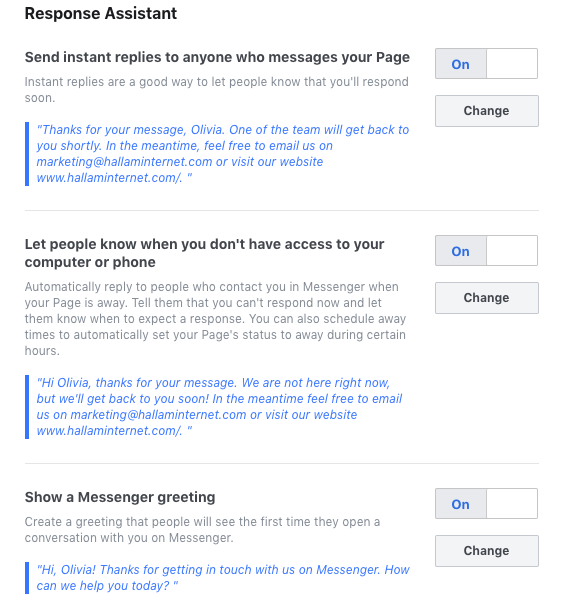
This essentially allows you to set up automatic replies when anyone messages your page. Instant replies are a great way to let people know that you’ve received their message and you’ll respond soon, or that you’re currently away (for example, out of business hours) but will reply as soon as possible.
Once you’ve done all of this, you can focus on generating really great Facebook content and getting those all-important likes flooding in. Make sure to let people know about your page by linking to it in your email signatures, print materials and on your website!

